Detecting Beaconing with Zeek
Detecting beaconing traffic can be challenging. One method I’ve found useful is through Zeek’s conn.log files.
If you’re in information security, which is probably why you’re reading this post, you’ve heard the term Command-and-Control, or ‘C2’. It’s a method by which a compromised system will attempt to connect to a host on the internet where it will get the next set of instructions.
How to detect C2 traffic on the network can be a daunting task. To get a solid feel for what’s going on in a network, and ultimately to find evil, I usually turn to Zeek for network visibility.
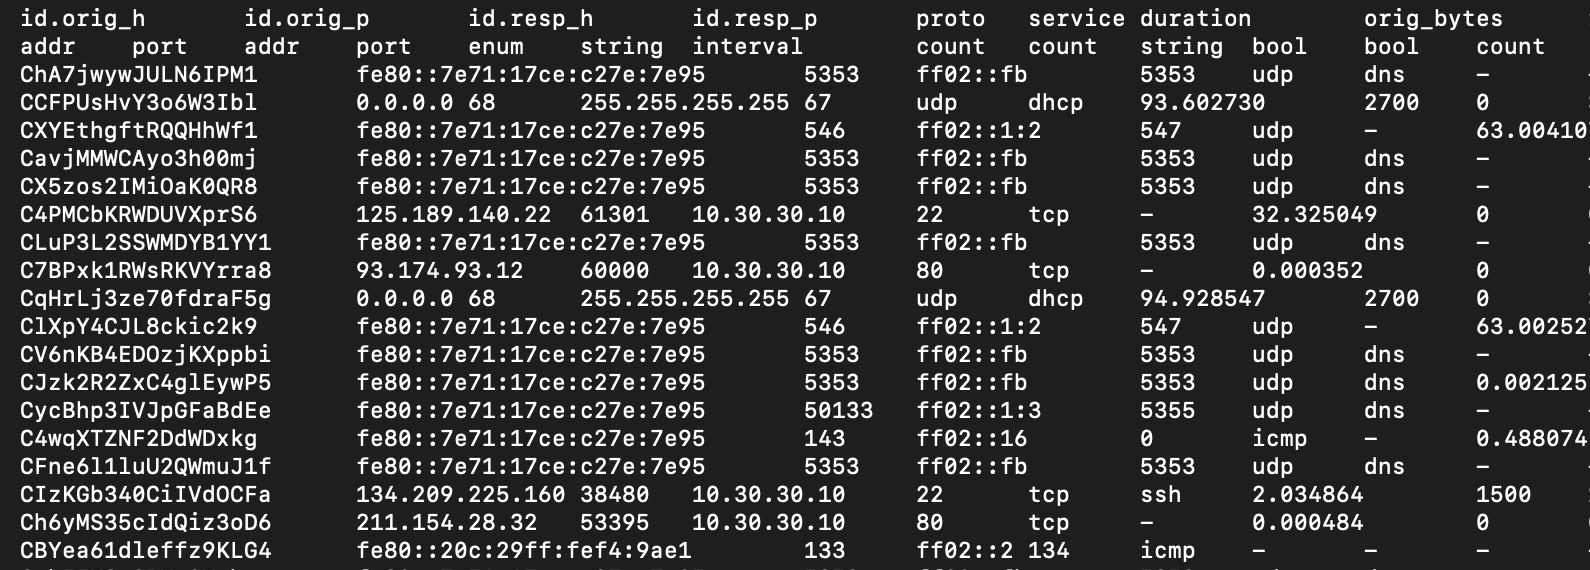
Zeek, formerly known as 'Bro', has a multitude of log files. The one we’re going to focus on in this example is the conn.log (I clipped off the tail end of the last few fields but here is a basic example of the conn.log).

The conn.log collects information for all TCP, UDP and ICMP connections and sorts them by session. This can give you a solid overview of what type of traffic you’re seeing at any given point. You can sort and organize your outputs of this file by utilizing ‘zeek-cut’ syntax (I’ll get to that in another post) or some awk’ing.
There are a few methods to comb through logs looking for beaconing traffic but in this post we’ll look for identical traffic being sent multiple times over an hour. Of course, as with most hunting exercises, it helps to know what’s normal in your environment.
‘Normal’ aside, here is a quick spreadsheet to gauge beaconing:

Here we’re looking at a day broken down by an hour (24), by minutes (1440) and seconds (86400) with “standard” beacon intervals of 5, 10 and 30 seconds. For example, if there is beaconing every 5 seconds you should expect to see about 17280 per day or 720 hits per hour... and so on.
Now to pull that information out of an hour worth of Bro conn logs…
Starting at the top, we’ll look at conn.log from a random tuesday at noon. You get the idea of the conn.log posted above but doing a quick line count on this file:
$ zcat conn.12\:00\:00-13\:00\:00.log.gz |wc -l
916158
So we’ll cut this down a bit and look for useful traffic. What we’ll look for in this example is:
- Source IP (id.orig_h / column 3)
- Destination IP (id.resp_h / column 5)
- Destination Port (id.resp_p / column 6)
- Protocol (proto / column 7)
- Bytes sent (orig_bytes / column 10)
What we’re focusing in on is bytes sent. Operating under the assumption that C2 traffic will continuously reach out looking for ‘something’ (http ‘get’, dns query, etc…) and in doing this, the sent bytes will be the same. A simplified example would be an icmp echo request. Depending on the source of the traffic the bytes sent will be the same. Extend this kind of beacon over an hour (or day, etc) we should be able to pick it out.
Let’s give this a go:
$ zcat conn.12\:00\:00-13\:00\:00.log.gz |awk ‘{print $3,”\t”,$5,”\t”,$6,”\t”,$7,”\t”,$10}’ |sort |uniq -c |sort -nk 1 |awk ‘$1 > 60 {print}’ |awk ‘$6 > 0 {print}’ |awk ‘$3 !~ /^10./ {print}’
To explain the command… I’m running zcat against the file as it’s in a .gz format. I prefer to use ‘awk’ to 'zeek-cut’ for this example as it’s universal (and throwing some “\t” in for tabs, making it easier to read). Then you’ll need to sort the dump, which is still not very useful. The magic comes from ‘uniq -c’ where you can get a count of every matching line. Then sort by that count (first column). Next, since we’re looking at an hour worth of traffic, we’ll look for a count greater than 60 (once per minute) with the awk ‘$1 > 60 {print}’. Also, we’ll filter out the null traffic with awk ‘$6 > 0 {print}’. Finally, we’re only looking for traffic destined for outside our network. In my example I’m on a 10.x network so we’ll filter accordingly with awk ‘$3 !~ /^10./ {print}’.
(Note: You do not need the {print} in the last 3 awk statements above as {print} is the default action unless otherwise specified - but I left it there to help anyone that is still learning, like myself. There very well may be more efficient methods to get to this point and I’m open to suggestions. But this works for what I’m doing)
The end result is as follows:

This shows counts between 62 and 856 from some internal 192.x and 10.x addresses destined for some dns and akami servers, along with the port, protocol and bytes sent. The interesting part of this output is the matching bytes sent - to have 104 identical connections to an akami IP with consistent bytes could be interesting. These lab examples are nothing outlandish as it's just a lab firewall reaching out for threat updates but you can see where this would be useful should you end up getting some C2 on your network that’s ‘checking in’ to an external IP address.
This method will result in some false-positives, as shown above. However, as you develop a baseline you’ll have a handful of IPs or networks you can ignore by adding a few additional awk statements, as well as some threshold counts, when you implement this into your SIEM.
Happy Hunting!

![]()
![]()
![]()